
So, you want to improve your website’s ranking for certain keywords on search engine results, but you are not sure where to start? We love the Yoast SEO plugin, because it makes keyword optimization smooth and simple. Install the Yoast SEO plugin and follow the steps below for any blog post, and you’ll be well on your way to optimizing your website!
Specify a Focus Keyword
Your focus keyword or phrase goes into the Focus Keyword box on the Yoast SEO widget below your blog post or page content. There are many different methods for researching and choosing a keyword strategy, and we won’t get into that here, but once you’ve chosen a keyword or phrase, type it in that little field.
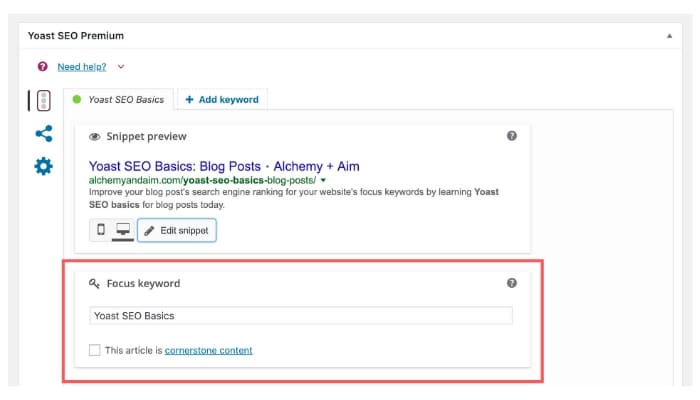
Then, make sure that keyword is also in your blog post’s title or somewhere prominent on the post—ideally in multiple places. Avoid keyword stuffing (awkwardly throwing your keyword in over and over again on the page), and place your keyword or phrase thoughtfully in places that make sense with your valuable content.
Write a Meta Description
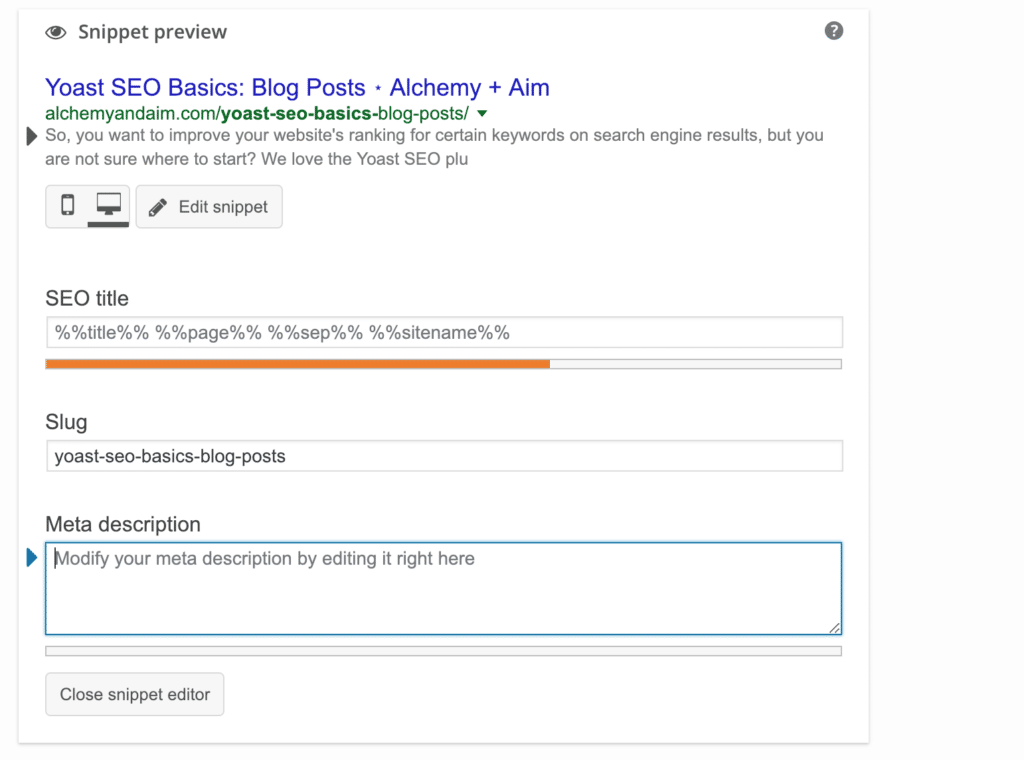
Click the “Edit snippet” button to write a specific meta description. This is the 1-2 sentence snippet that shows on google search results. If you don’t specify these sentences, Yoast will display the first 155 characters from your page or post. Likely, the first 155 characters shown by default are relevant and make sense, however, you have an opportunity to make a stronger impression by intentionally choosing what is displayed here.
A great meta description is written using active verbs, is relevant to the content, and includes a call to action—some motivation for a user to click the link and read more. The meta description is also a key location to include your focus keyword. Check out Yoast’s tips on writing this snippet and example meta descriptions for inspiration.
Here’s an example of a default meta description:
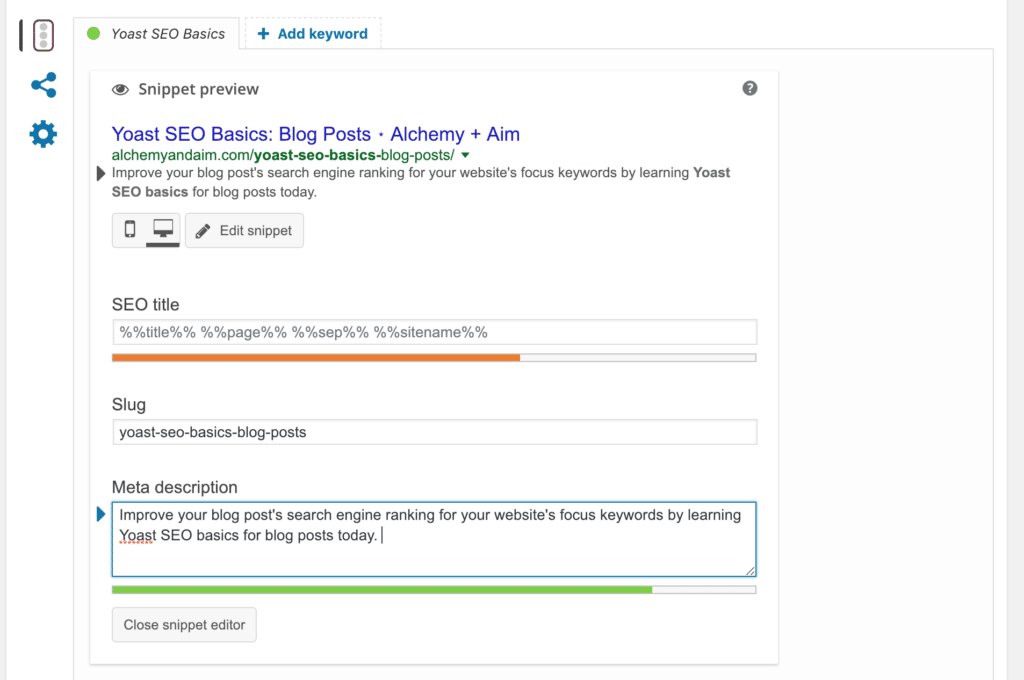
Here’s what it looks like after specifying a meta description which includes the focus keyword:
Scan the Analysis Section for Stoplight Colors
The final step in using Yoast SEO to optimize your blog post is to take a look at the Analysis section. This area will provide recommendations for further optimization of your post, as well as a stoplight color ranking of green, orange, or red. Let’s get one thing straight here: we do not recommend that you drive yourself crazy trying to make all of the stoplights turn green.
Here’s the analysis for this post—notice how we left a few stoplights that are red or orange, but made sure most of them are green:
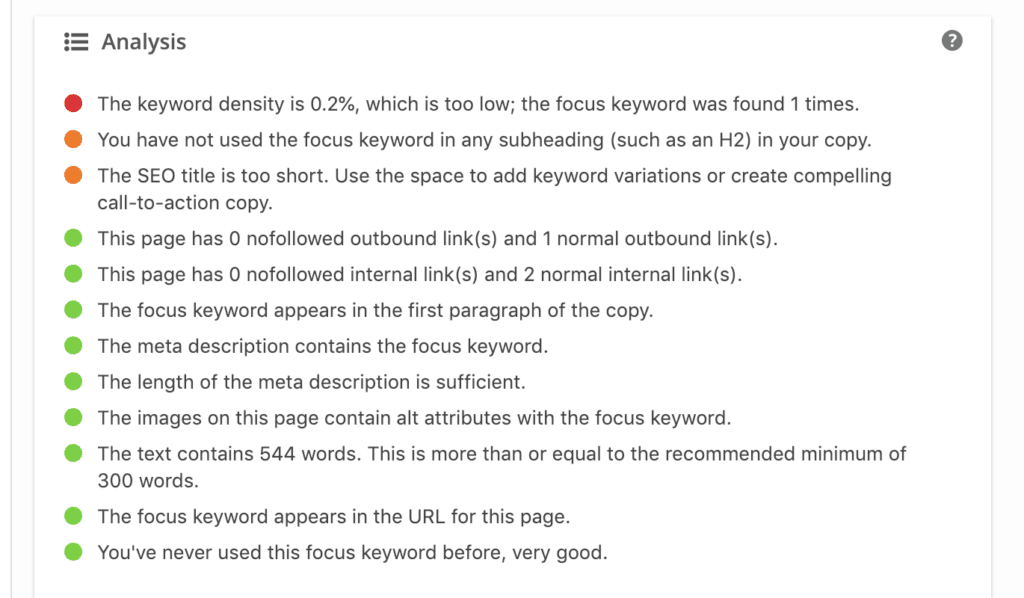
We do recommend that you take a moment to glance over these recommendations to see if any simple changes jump out that will not require you to restructure your blog post. Examples of quick fixes you might see in this section are adding alt text to your images or removing stop words (the, and, to, etc.) from your URL. Other recommendations might not be actionable given what you have written, so simply change the ones that make sense and aim for more green than red or orange lights.
Follow these three steps and ensure that you are writing quality content on your blog, and you will be well on your way toward optimization!
Are you unsure yet what you want your blog or website to be known for? We offer StoryBrand sessions to help you uncover your brand’s unique story, which is the first step to determining your marketing strategy and what keywords you’ll optimize for using Yoast SEO. Contact us for more!